Today I’ll show you how to make a bracelet (or any other accessories) with cellulose acetate as well, I’ll say you a couple of things you should avoid.
Cellulose acetate has many applications, such as the photographic negative for movies.
(Image from histoptica.org)
In our case it is a great substitute for the shells with which before were made bracelets and combs (the turtles are not guilty of fashion trends), we can find multiple colors, and thicknesses. In addition to solid colors, imitation is found in tortoiseshell shell, bull horn … Bought as almost all these things in specialty craft stores.
In particular, bracelets you see today are ivory white, 2 mm thick.
The first thing to do is draw the shape you want to use, I am drawing on the computer because I’m not good at hand drawing and I also avoid the greater part because these pieces are usually symmetrical and have many repetitions.

The basic material we need is the following:
– Design of the piece.
– Glue sticks.
– Fretsaw.
-Drill (to make holes inside).
– Basin (large enough for the part not touch the sides)
– Acetone.
Acetate can be cut with a fretsaw, which makes it a good choice for homemade crafts as we do not need very specific tools. I cut it with the jigsaw table, because I have one, but the technique is the same.
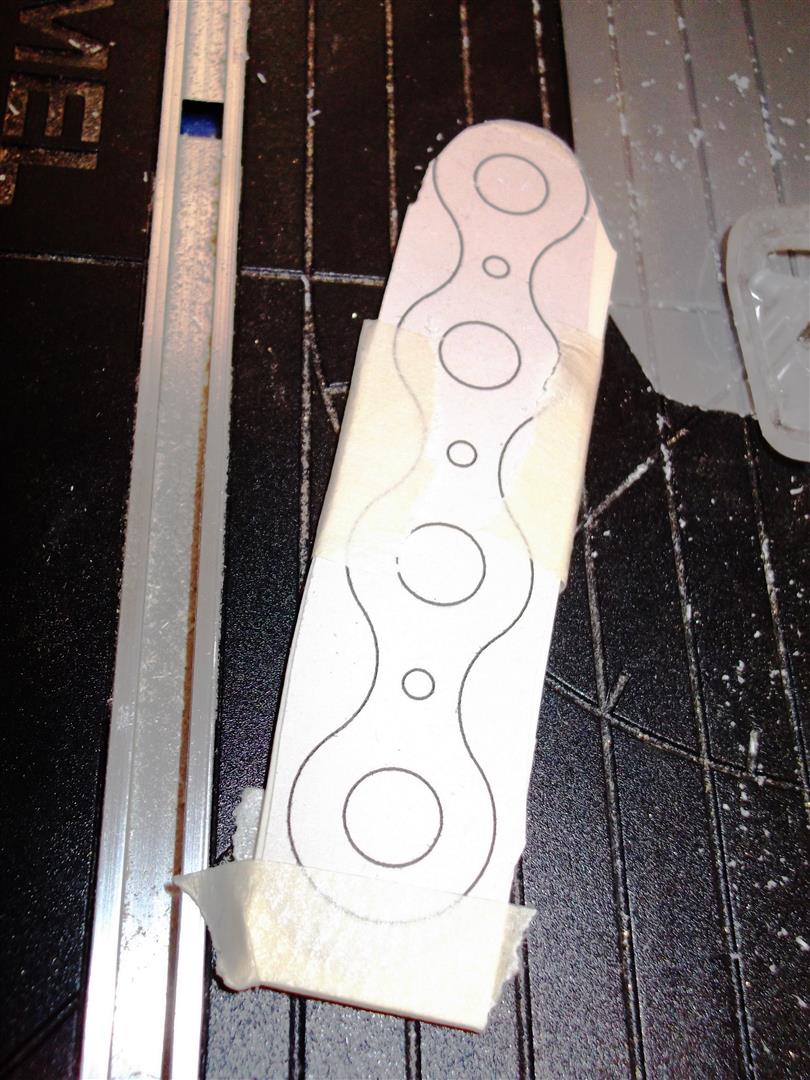 To cut the pieces I recommend you to you adhere drawing with glue stick. Sticks enough to keep it from moving, but rather little to remove it easily.
The cut is a matter of patience and a little skill. For those who do not know that I only point that for make the interior drawings must make a hole in the side of the piece you want to remove and insert the blade hair. Once assembled the saw we can continue sawing from within.
Once cut do not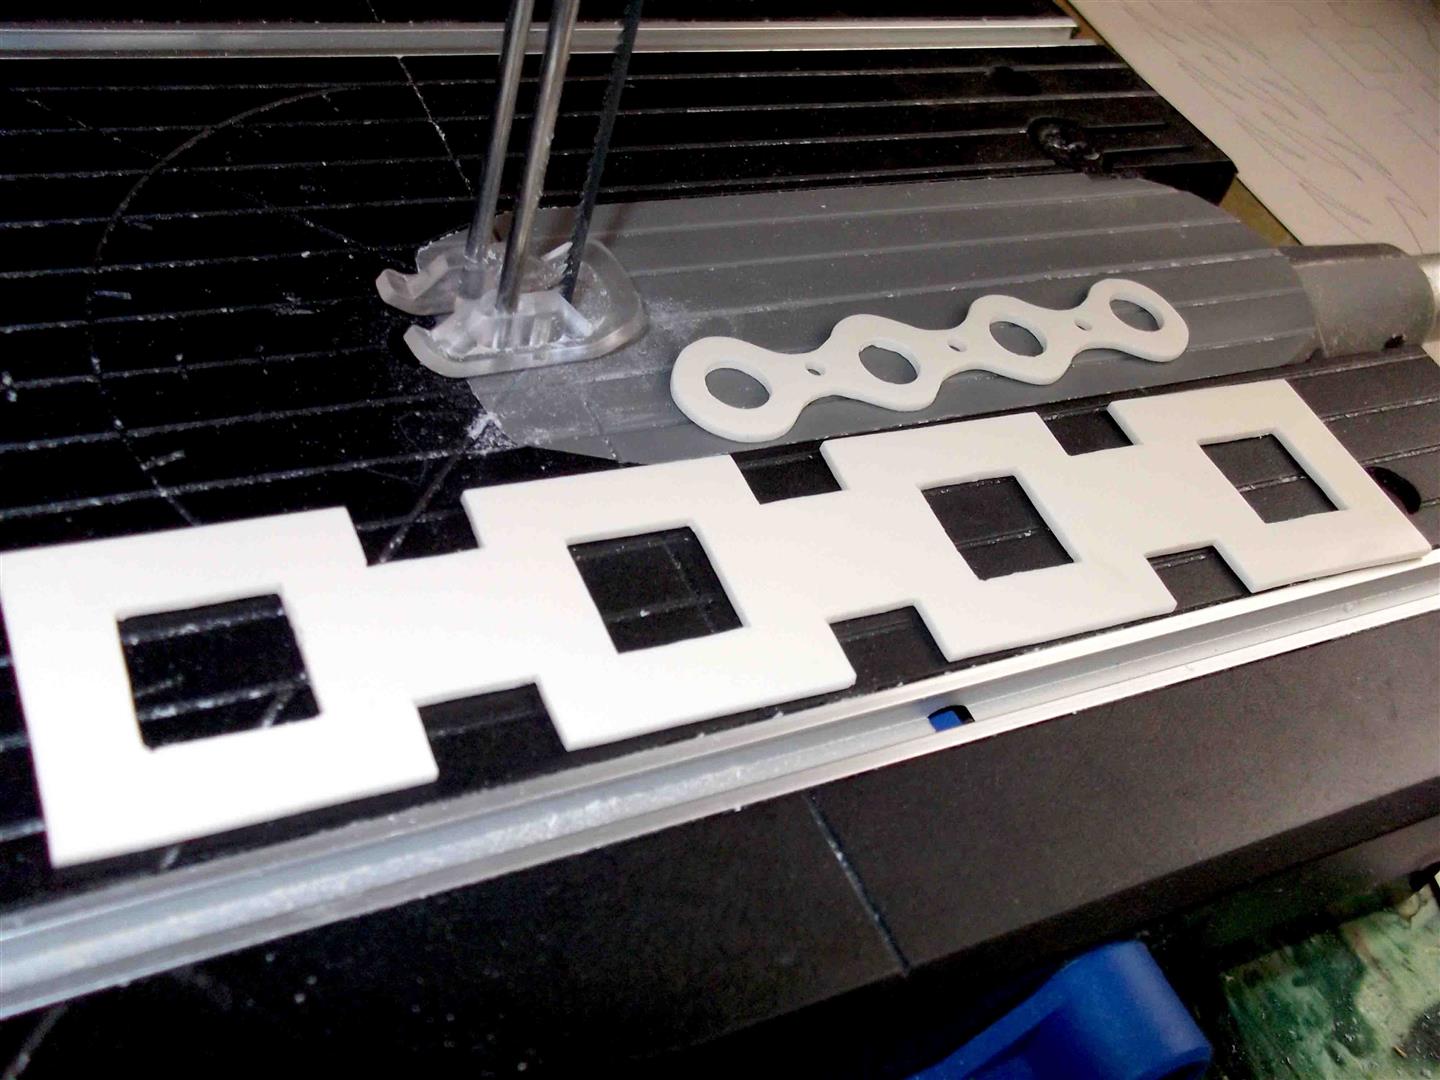 worry if the edges are a bit rough, that will be refined later.
When we remove paper it might remain attached. It will be removed by introducing the bracelet in hot water.
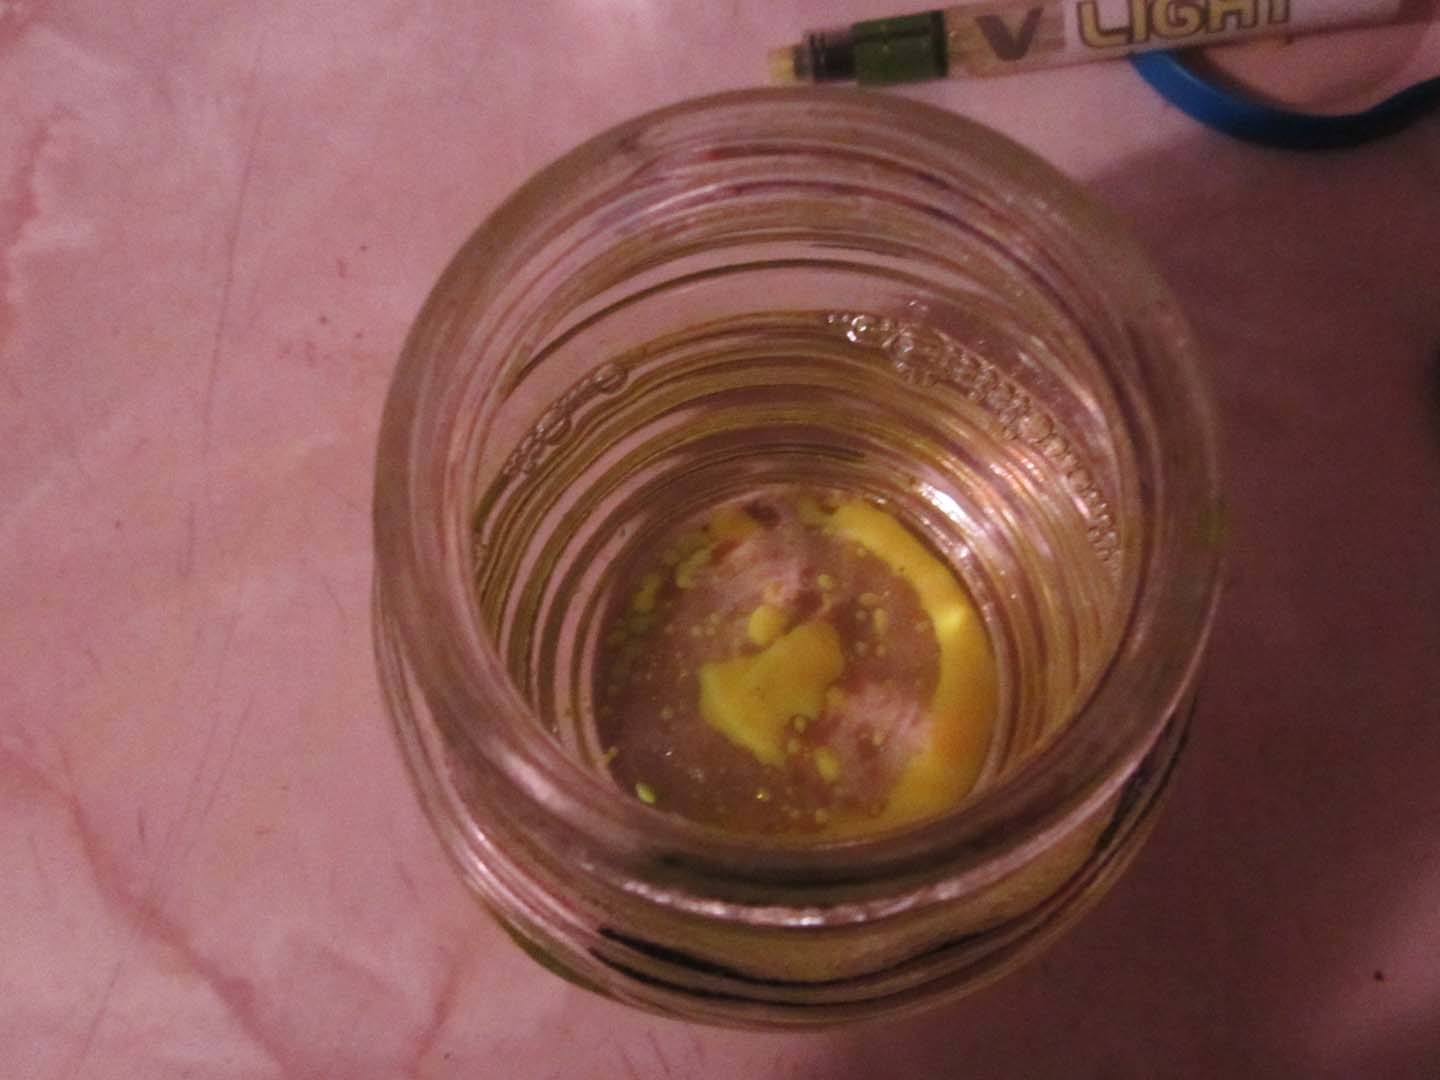
 The only thing maybe a little complicated of the process is the time to polish it. Cellulose acetate is dissolved in acetone, so we fill with it a sufficiently large tray that our work does not rub against the edges or bottom. I manage the pieces hanging them with two wires, so that the contact surface is the smallest. If this is the first time, its better for you to try with a scrap.
Attention: acetate dissolves very quickly. The longer submerged, more rounded edges, but we got the shine on the surface will end “messing” with the dissolved material layer itself if it is too long. We may leave marks with wires. I recommend a short pass and on the move, for the acetone to flow and clean the surface. (Acetone is highly volatile and flammable. Beware.)
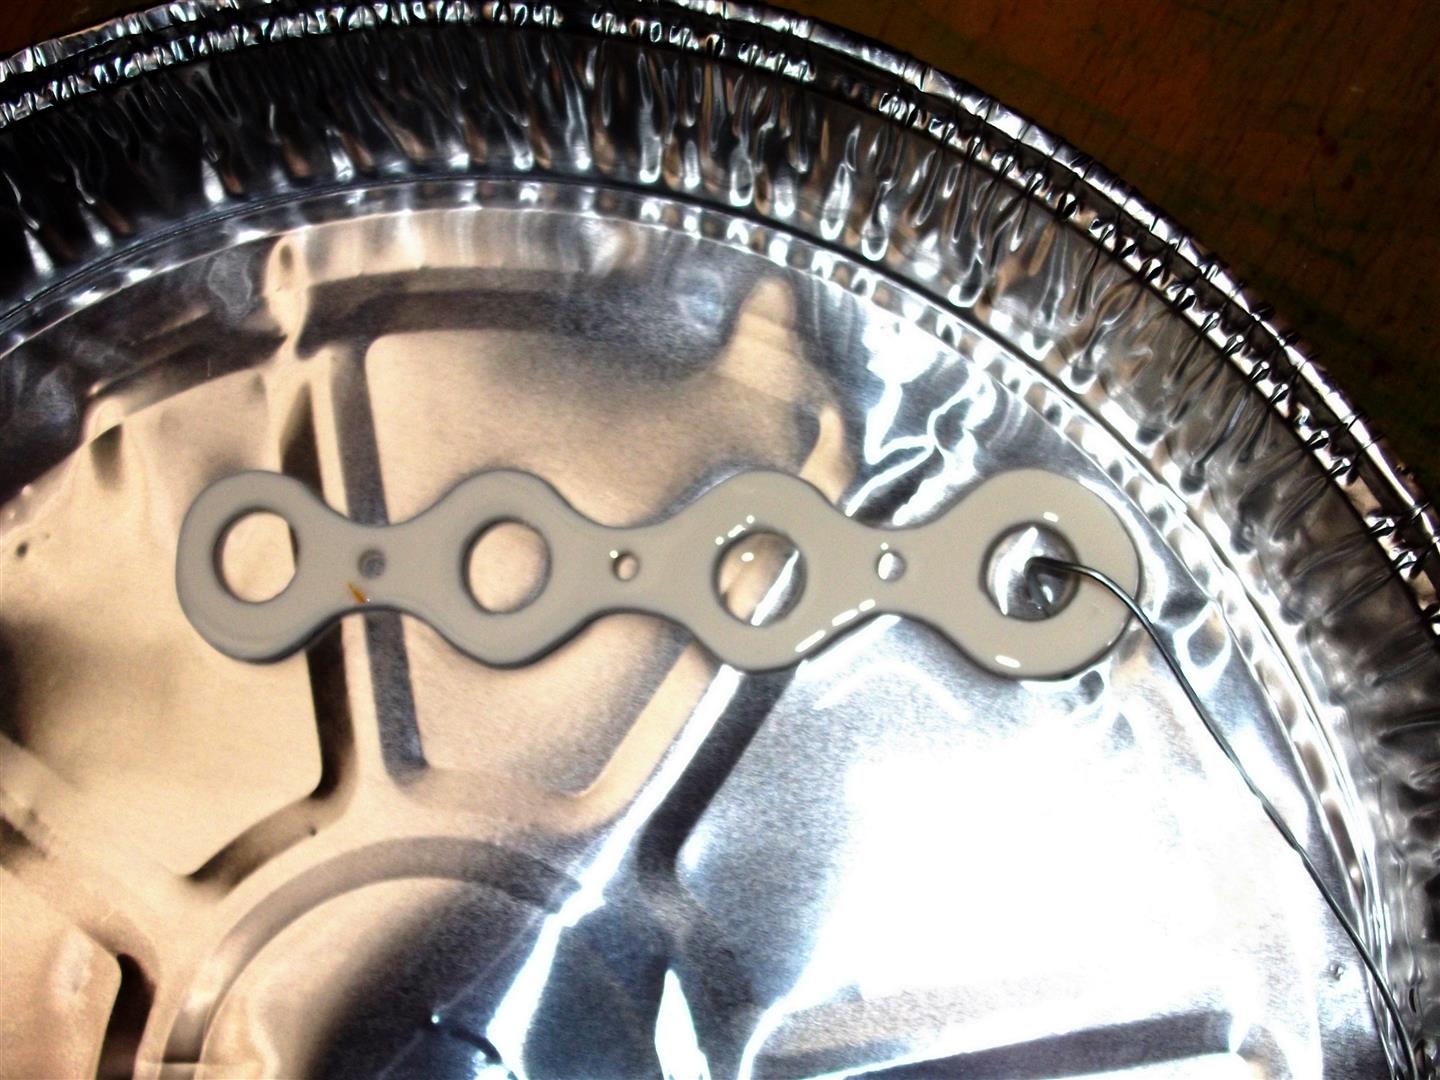
As you see in the picture, I used a small tray too, among other things because at that time I did not have much acetone. That might have made the bracelet stick to the bottom.
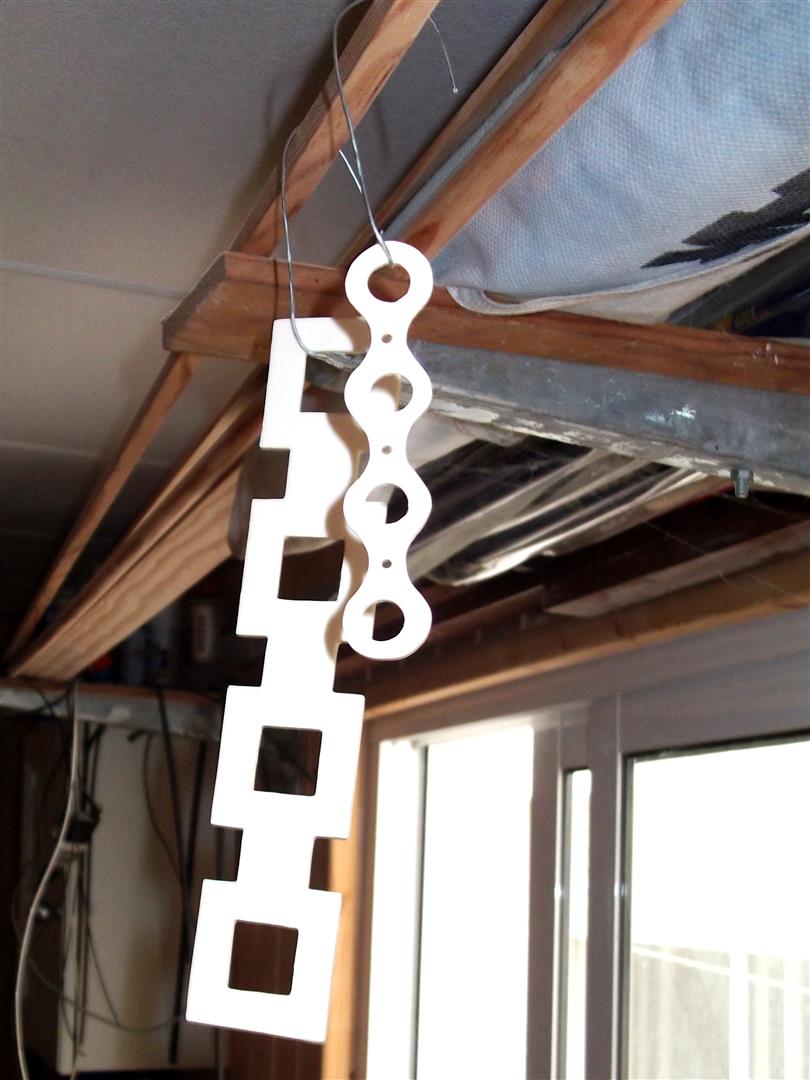 As we get the acetate from the tray, we hang it somewhere that does not touch anything but the wire, being careful not to touch it with your hands, because it would leave the track.
Since I was working on it, I took the opportunity to make a matching combs.

 Now that we have the flat bracelets just have to give them shape. It is best to put them in hot water for a while until they are a bit squishy and round them by hand or with something we can use for mold.
Here are two mistakes that you should not commit.
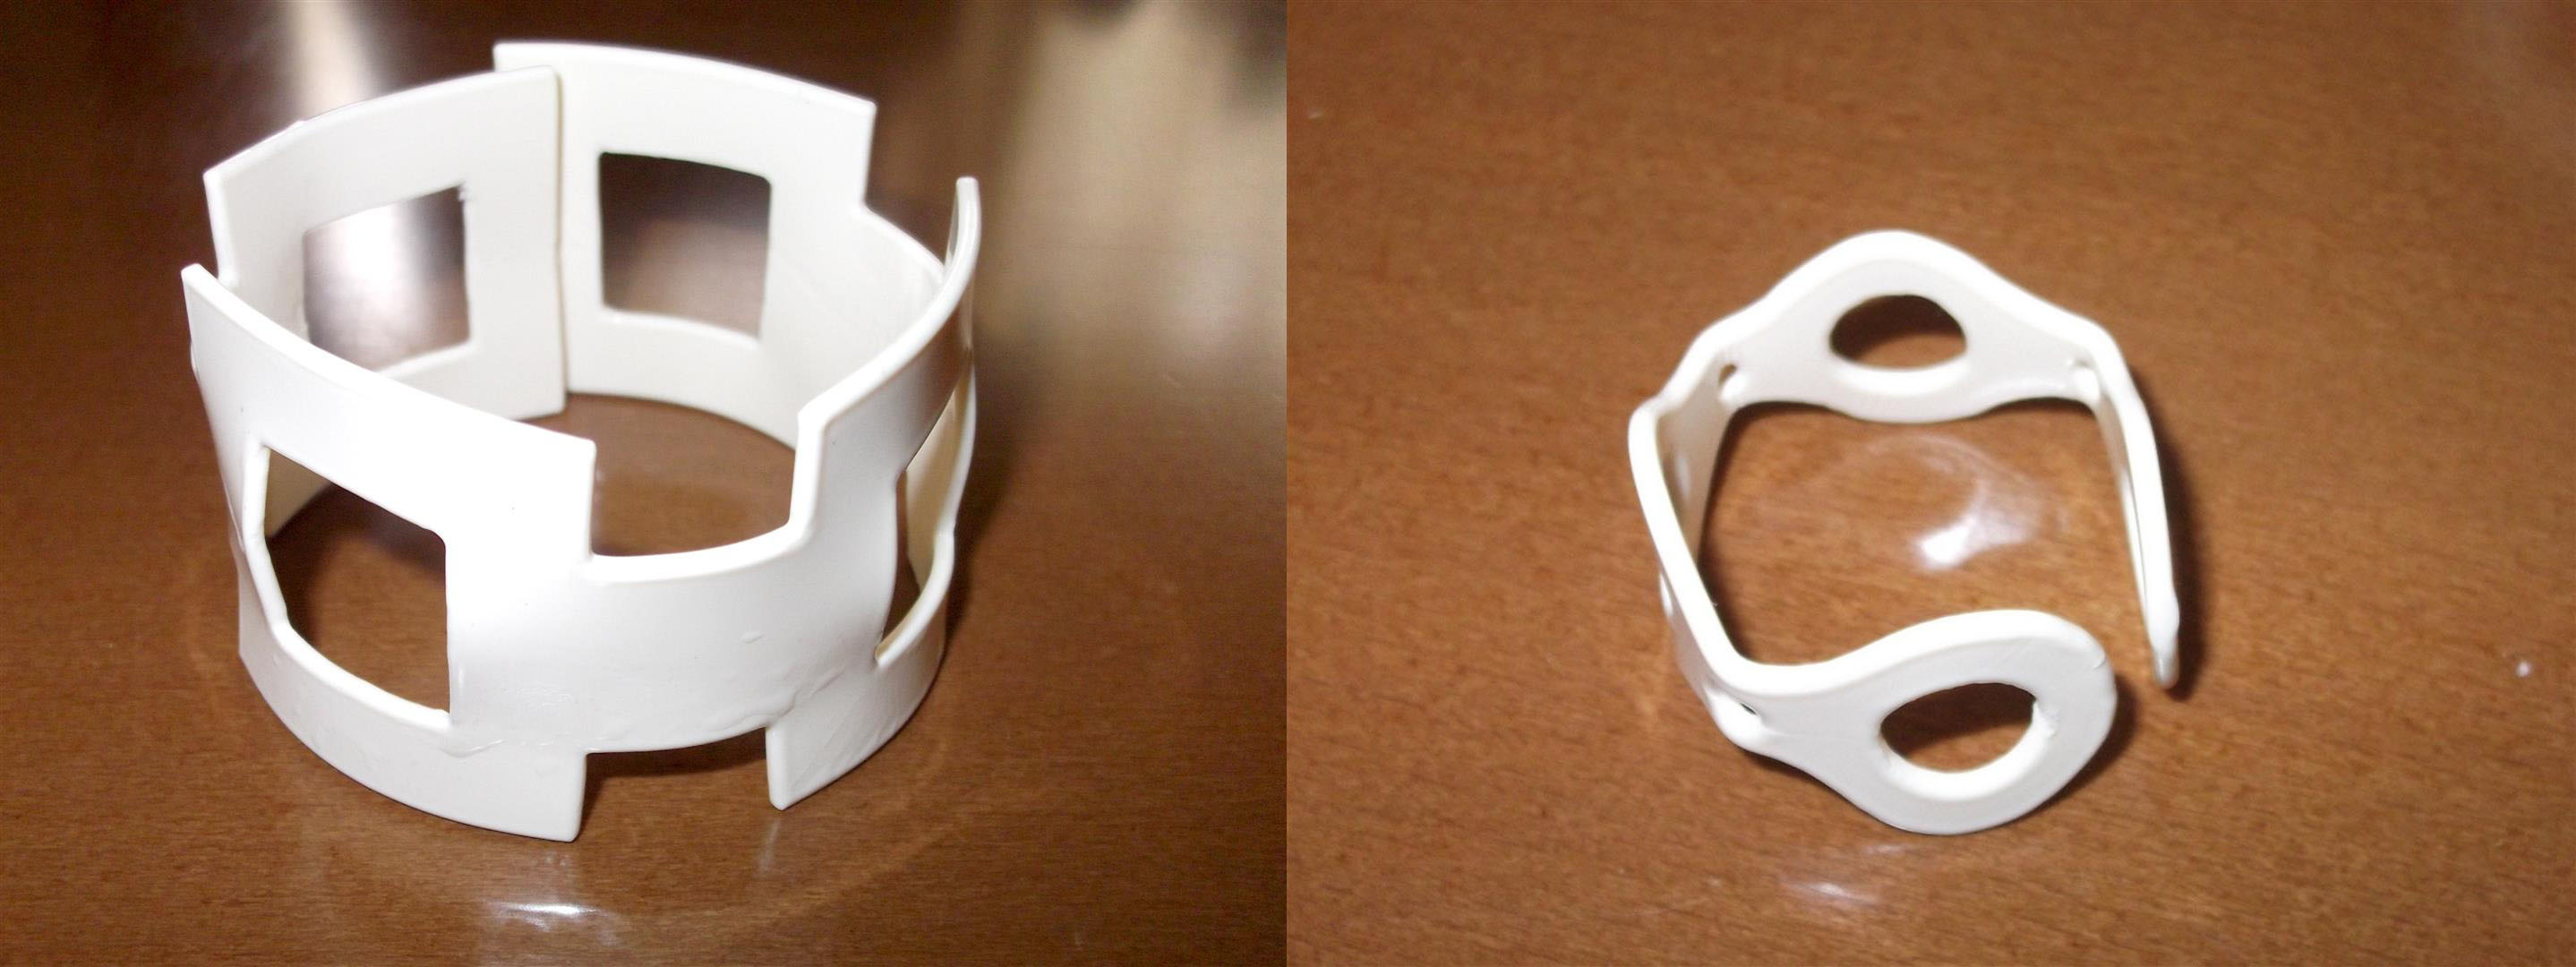
The large bracelet was too tight with rubber hair band, so in the end was deformed. If you have to use some mold to the shape of the bracelet, it is better to tighten the same way everywhere.
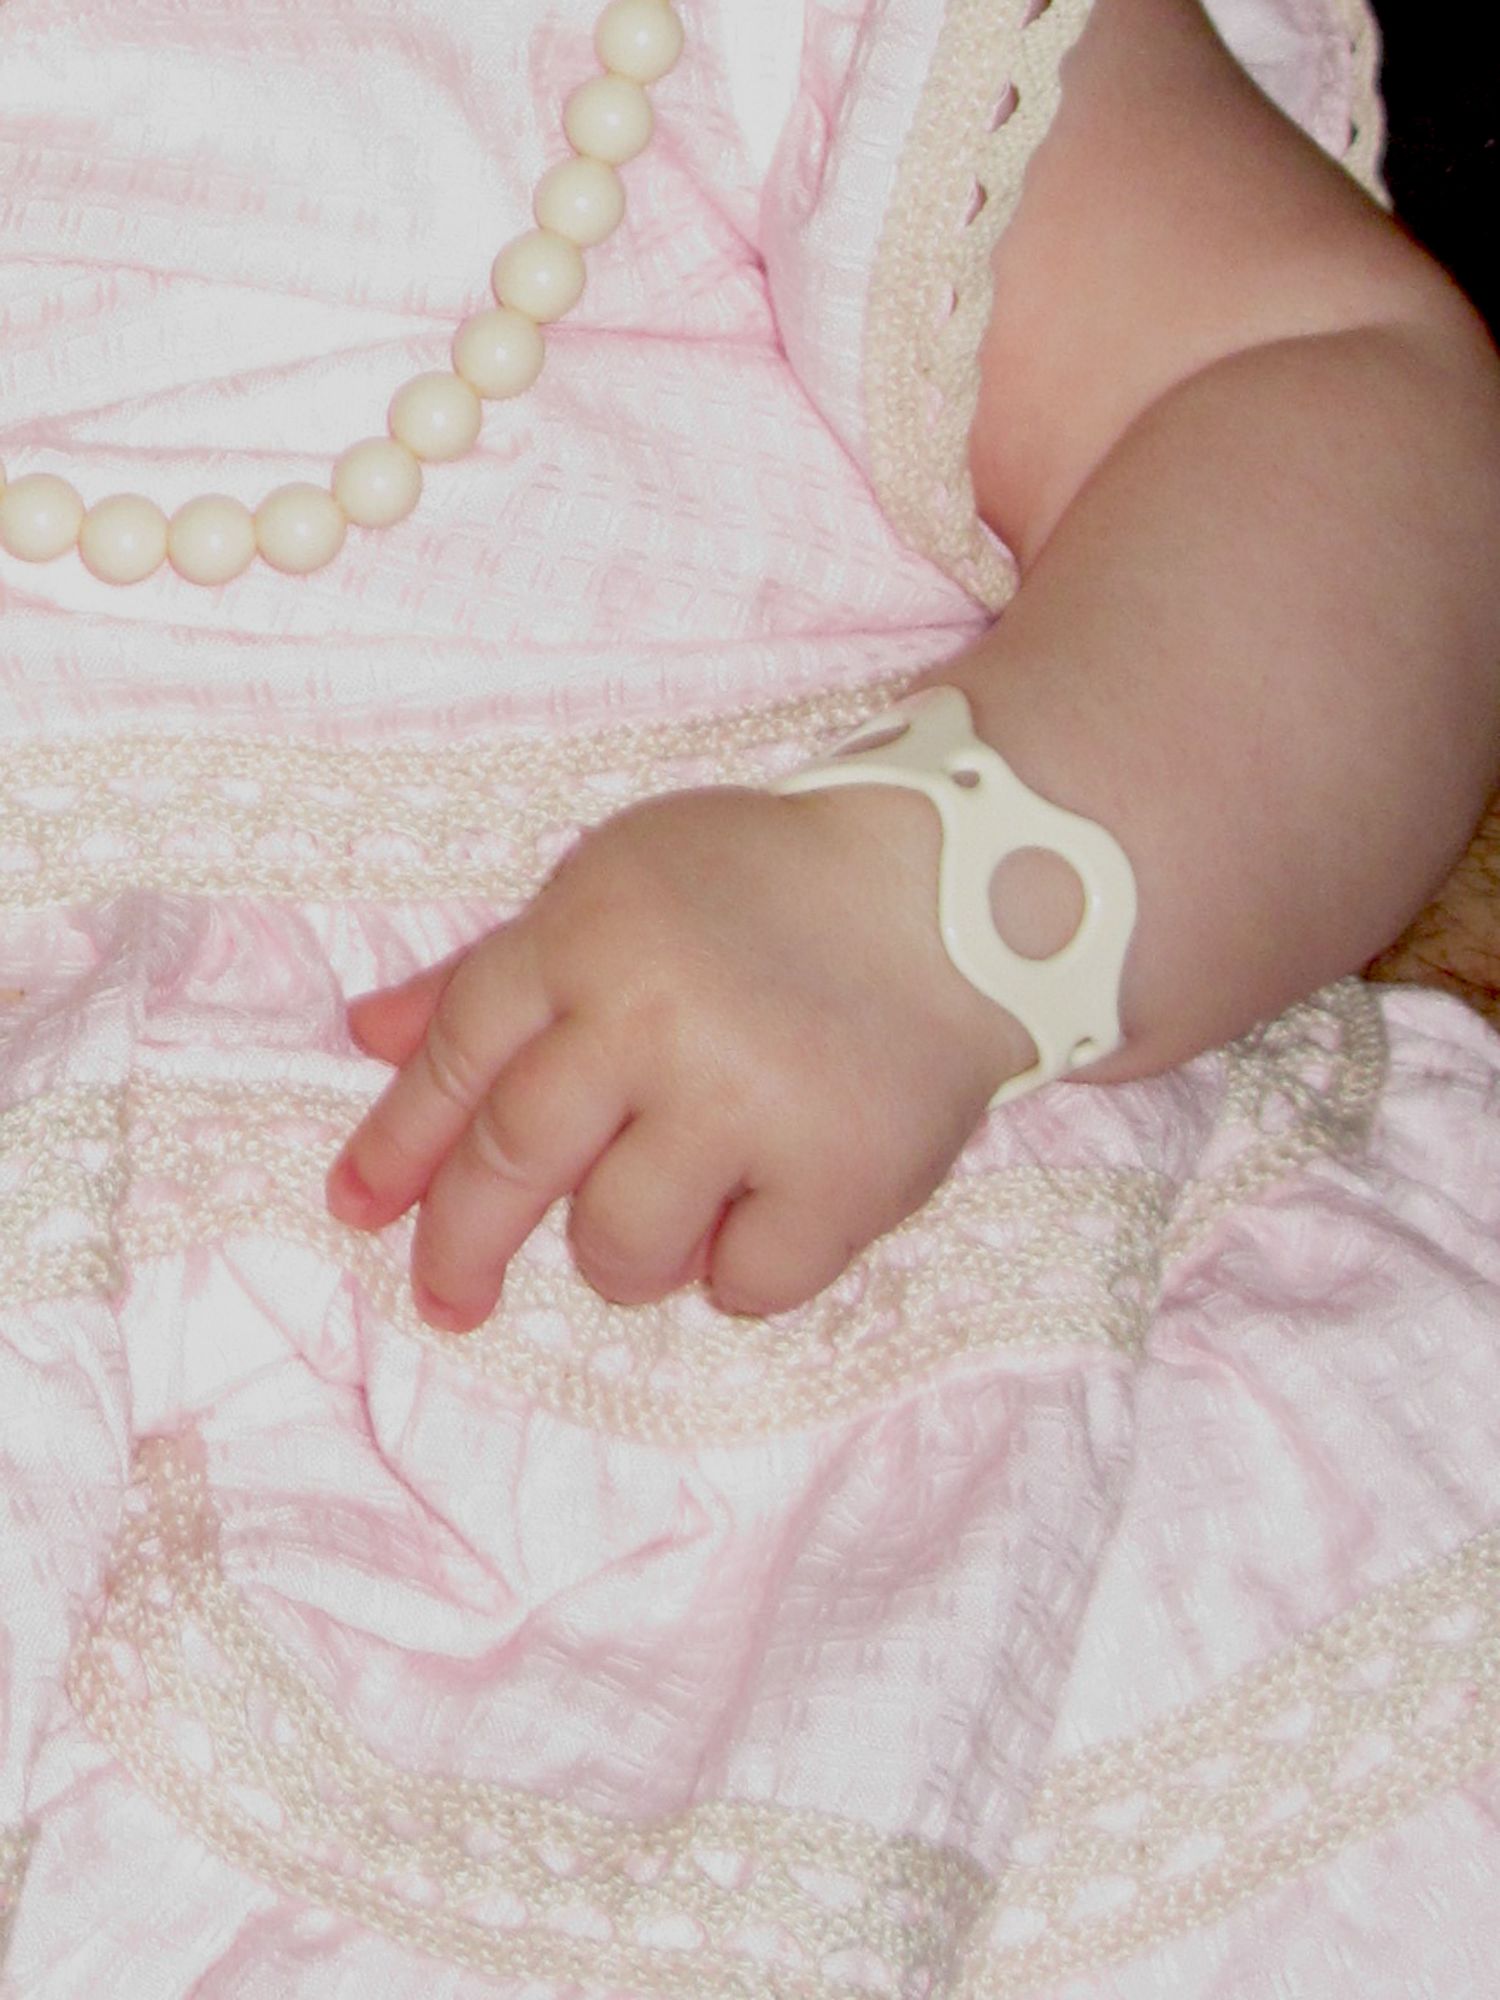 You see that the little one has been rather square. That’s for two reasons. One is that the diameter, it was too small because it was for a baby, and the other, more important, is the design with wider and narrower areas,it favors that double in the weakest point. When we do the drawing there are things to consider as you do not have much weaker than other areas or very acute angles that will be hard to bend with the same radius as the rest of the piece.
 Finally I leave the comb I did when my mother was godmother of the wedding of my older brother, and other small combs and other models. I have to say that these were laser cut, which is much faster and easier, but the theory is the same.

I say, to encourage you to make these things, that the comb was my first job with this material, and it was not bad, so you know, start working that spring is soon here and begin the celebrations everywhere.