Author: Mj2

  • A very special guestbook.

    A very special guestbook.

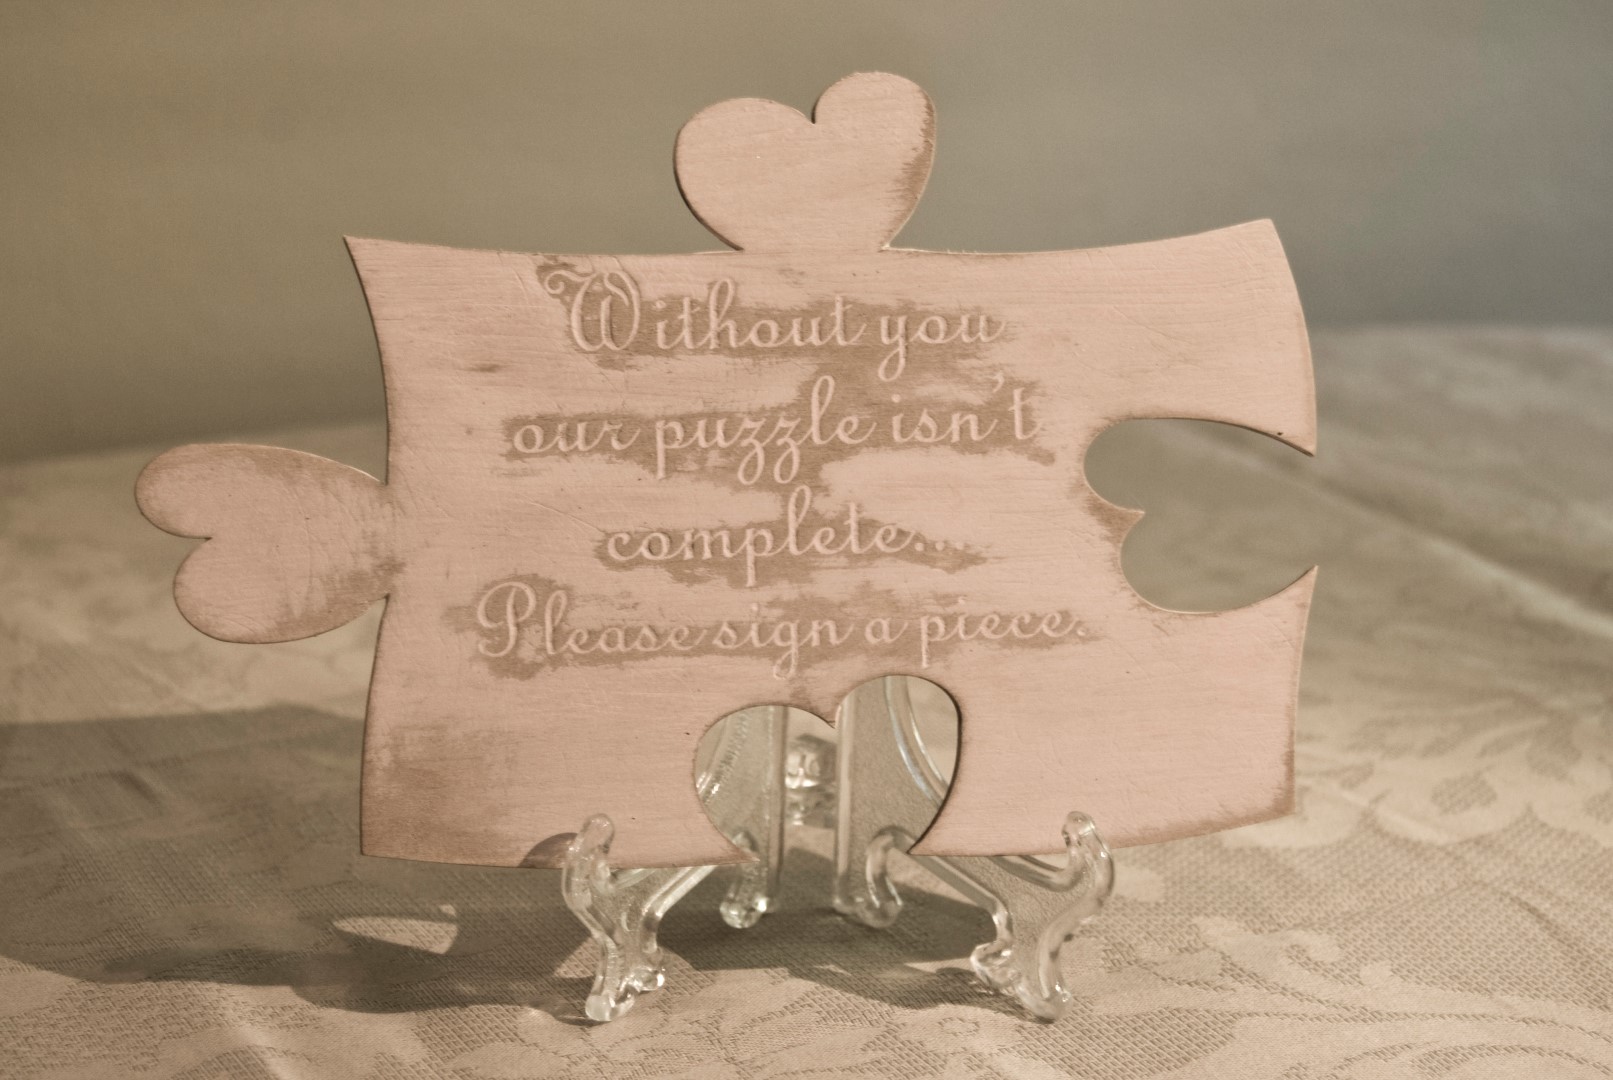
    It has become very popular (which we did not know, why deny it), the idea of placing as guest book at weddings and other celebrations, a puzzle in which the guests sign one of the parts so that you can keep memories framed or stored in a box.

    It is an original idea that one girl asked us a few days ago for her wedding.

    Although its sold everywhere, in wood, cut and engraved with laaser, she liked it painted in a light color, and in a “vintage” , worn-out style, so she commissioned to us.

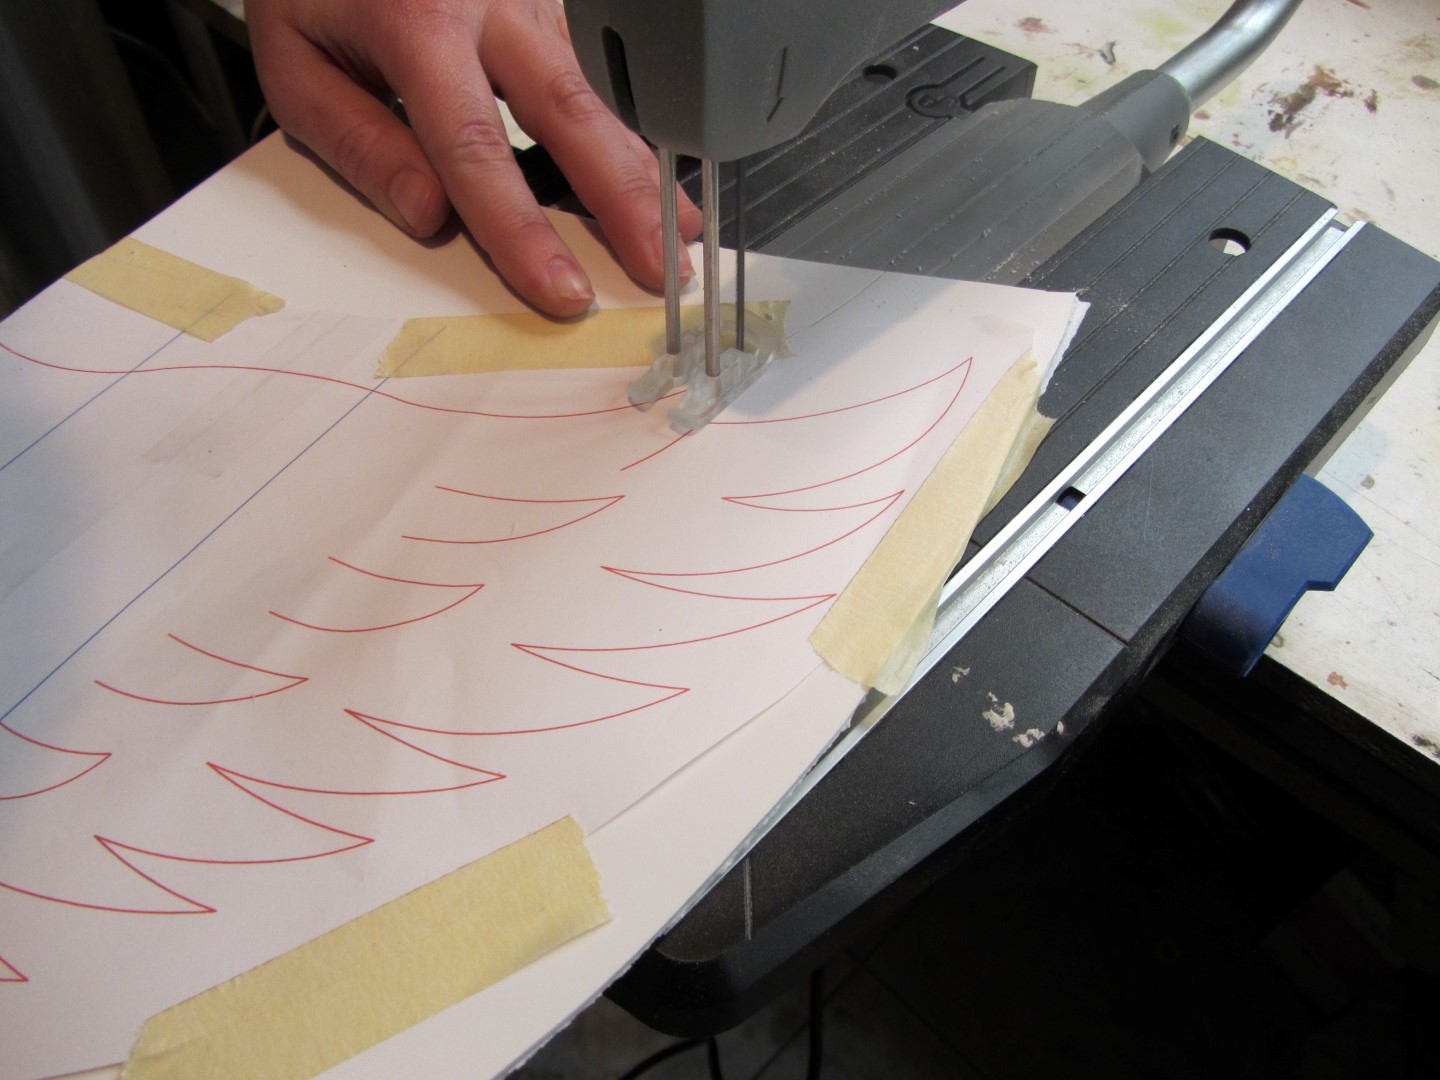
    In this case I can not show you the step by step because we hadn’t the opportunity to make the corresponding photos, but I can give you some tips to make it, because although the one you see here is laser cut and not everyone have one available you can decide to do it by hand.

    12b

    1 (Large)2 (Large)6 (Large)

    If you want to make one, here’s the template. You can download a pdf at the following link.

    puzzle imagenpuzzle to download.

    And a few tips:

    – You can use the standard wood sold to do manual labor, but we advise you better use 3mm plywood. (It is sold in model shops) because it is smooth and firm, and will splinter less.

    – To paint the wood as you see, worn kind, we recommend staining the wood first with walnut stain (or diluted paint, since we  have not given a primer hand, it will absorb the paint) of the color yuo want for background, and once dry, with a swab or a cloth, apply furniture polish in areas that will expose (sanded), the wax paint not stick in wax and then will be easily removed.

    – Depending on whether the end result we want to see the grain of the wood or not, apply primer in this moment. (O diluted white glue). In our case we did not.

    – When choosing the color, must be taken into mind that the color of dried paint is generally darker than the one we see in the pot.

    -The name and drawings (if we do not have laser) you can make them in various ways, either with brush and paint (rather dense, so it will not run through the veins), also with markers (if you have applied the primer, for the same reason). If you have pyrographer or electronics welder, you can burn  it with heat. In this case best done before the paint and polish them, so they will not be covered then.

    – Sand lightly with fine sandpaper across the surface, insist a little more on the areas where we want to lift the paint. (it will easily because it has wax).

    Nothing else. Patience, in the end it will be nice.

    And if you have a special project in mind but do not have means, contact us for a budget.

    If you have any doubt that we can solve, do not hesitate to contact us.

  • The invention of the telephone.

    The invention of the telephone.


    On June 25, 1876, Alexander Graham Bell demonstrated the prototype of its new invention, the telephone and it is this apparatus that I’m talking about today.

    TelephonePatentDrawingBell
    “TelephonePatentDrawingBell” by Alexander Graham Bell – This media is available in the holdings of the National Archives and Records Administration

    We are not going into a controversy of who actually invented the telephone and the reasons why Antonio Meucci (who had begun the process of its patent years earlier) and Elisha Gray failed to patent it before. The fact is that the patent was issued to Bell on March 7, 1876.

    Bell had great knowledge of acoustics and voice modulation as his mother and wife were deaf, and his father, grandfather and uncle were all elocutionists.

    For many years he focused his efforts in trying to transmit sound through electric means.

    In 1874 while trying to develop a harmonic telegraph, his assistant Thomas A. Watson discovered that could transmit more than one note using iron membranes driven by electromagnets. Bell immediately saw the possibilities it offered them and began to develop a new device to transmit voice.

    84842_3
    Primer diseño de teléfono.

    In 1875 they built the first model (shown in the photo at left) that did not really work.

    After some experiments and modifications, including a membrane of little harder iron, or a liquid transmitter, Bell decided to patent it (even without many details of the invention) seeing that it was viable (with quite discreet results).

    On March 7, 1876 he was awarded with the patent and starts experimenting again. Only three days later, on March 10, managed to transmit the first words to his assistant who were in another room.

    This page in his laboratory notebook records the event:

    Biblioteca del congreso Diario de laboratorio de Graham Bell. Dia 10 de Marzo de 1876.

    “I then shouted into M [the mouthpiece] the following sentence: ‘Mr. Watson–come here–I want to see you.’ To my delight he came and declared that he had heard and understood what I said. “.

    The demonstration that took place in the Universal Exhibition in Philadelphia, announced the invention to the world and the news caught the press at the time.

    In November 26, 1876 the first telephone conversation between the cities of Boston and Salem, Massachusetts, at a distance of 16 miles is performed.

    One of the two phones that were used at that time is in the National Museum of American History (Smithsonian).

    Bell's Large box telephon Bell box telephone.

    Bell's Large box telephon Bell box telephone.

    It consisted of an iron diaphragm, two iron core coils and a permanent horseshoe magnet.

    As described by the museum itself:

    “When used as a transmitter, sound waves at the mouthpiece cause the diaphragm to move, inducing a fluctuating current in the electromagnets. This current is conducted over wires to a similar instrument, acting as a receiver. There, the fluctuating current in the electromagnets causes the diaphragm to move, producing air vibrations that can be heard by the ear. This was a marginal arrangement, but it worked well enough to be employed in the first commercial services in 1877. The magneto receiver continued to be used, but the transmitters were soon replaced by a carbon variable-resistance device designed by Francis Blake and based on a principle patented by Thomas Edison.”

    And this is where we present our work.

    With the invaluable assistance of my father (Jose Manuel Corral Rodriguez), who has developed and built with us this model (and here we thank him), we have built a working replica of the first commercial model.

    1 (Large)

    6 (Large)

    Although some elements have been modified to replace by modern pieces (like magnets), the external appearance is the same as the original.

    Here’s a soundcheck:

    17 (Large)16 (Large)14 (Large)12 (Large)8 (Large)

    As explained in the description of the Smithsonian, soon using this model as a transmitter and receiver, they decided to adopt the carbon microphone, thanks to which they could hear much better.

    We have also constructed a (not replica) device to use one of these microphones without the need to have two copies of the phone.

    6

    Together with some 32 feet cable, to be able to move away enough so that you can hear the device itself, not the raw voice.

    You can buy one of our replicas in our store.


  • Custom micro stand.

    Custom micro stand.

    We love our work. Definitely. It’s fun, and it’s especially satisfying when someone makes us a commission like that one we show today.

    One day a girl contacted us asking if we could make a custom micro stand (for a gift) and after a few conversations about what was within the capabilities of both parties, we came to the conclusion of making something like this:

    micro

    Well… Let’s do it!!!

    The first thing we did was buy anatomical models of spine and skull for a good base.

    The main points to be considered were:

    1- Elaboration of the wings:

    A 5mm pvc d¡cut and folded as a metal sheet,  (to suit later to the skull)

    IMG_3895

    IMG_38992- Attaching to the microphone stand:

    IMG_3898At first we thought that the foot bar should go through inside the skull, and we made a hole with a through tube. Then we saw that in this way, it was no space to place the spine in place, so we opted for screwed clamps.

    IMG_3956IMG_3919In addition, the column was loose vertebras, connected by a flexible cable, to bend, which did not interest us, so we dismantled and glued each one to give them more rigidity, (but retains some flexibility)


    3- Give an evil face to the good old Willy (So called in honor of the one-eyed Willy)

    We find that “Willy” looked like a good boy… so once placed the red LEDs and a switch (which decided to put on the advice of a friend), could close the skull and get with modeling. A little less nose, a little more cheeks and eyebrows … Modeling with epoxy putty dry air, as the polymer that we usually use dries in the oven, and poor Willy was not going to hold on.

    IMG_3922IMG_3933IMG_3943IMG_3949

    4- Painting:

    After sanding sessions, painting time.

    We used automotive paint and special coating for resistant (within reasonable) to wear and scratches.

    willywilly_7willy_15willy_47 (3)willy_39

    5- Finish:

    Although we were hesitant (both client and us) finally we decided suitable a touch of black. Being over the paint can be removed easily so once in their possession they can modify it to their liking.

    willy_75willy_50willy_54willy_55willy_61willy_68willy_47DSC_0075

    In the end “he” was like family … fortunately we know that he has gone to a good family. We hope he’ll see the world and have many successes.

    The gift was for Manolo the lead singer of ADVERMIX from Murcia. Their facebook and the web of the group:

    https://www.facebook.com/pages/ADVERMIX/300508743453?sk=info&tab=page_info

    http://advermix.weebly.com/