Category: Réplicas

Replicas de artículos de películas o televisión.

  • How to etch brass. Kit’s collar. (Charmed)

    How to etch brass. Kit’s collar. (Charmed)

    We love it when someone reads our blog and asks us if we could do
    something that we hadn’t thought. When this is the case and its
    something within our capabilities, we start to investigate very soon.

    It’s more fun the less we know about the technique that we will need. So
    whatever the final result is, and regardlsee the potential client likes
    it or not, we will learn something new, and this is the case that I’m
    writing today.

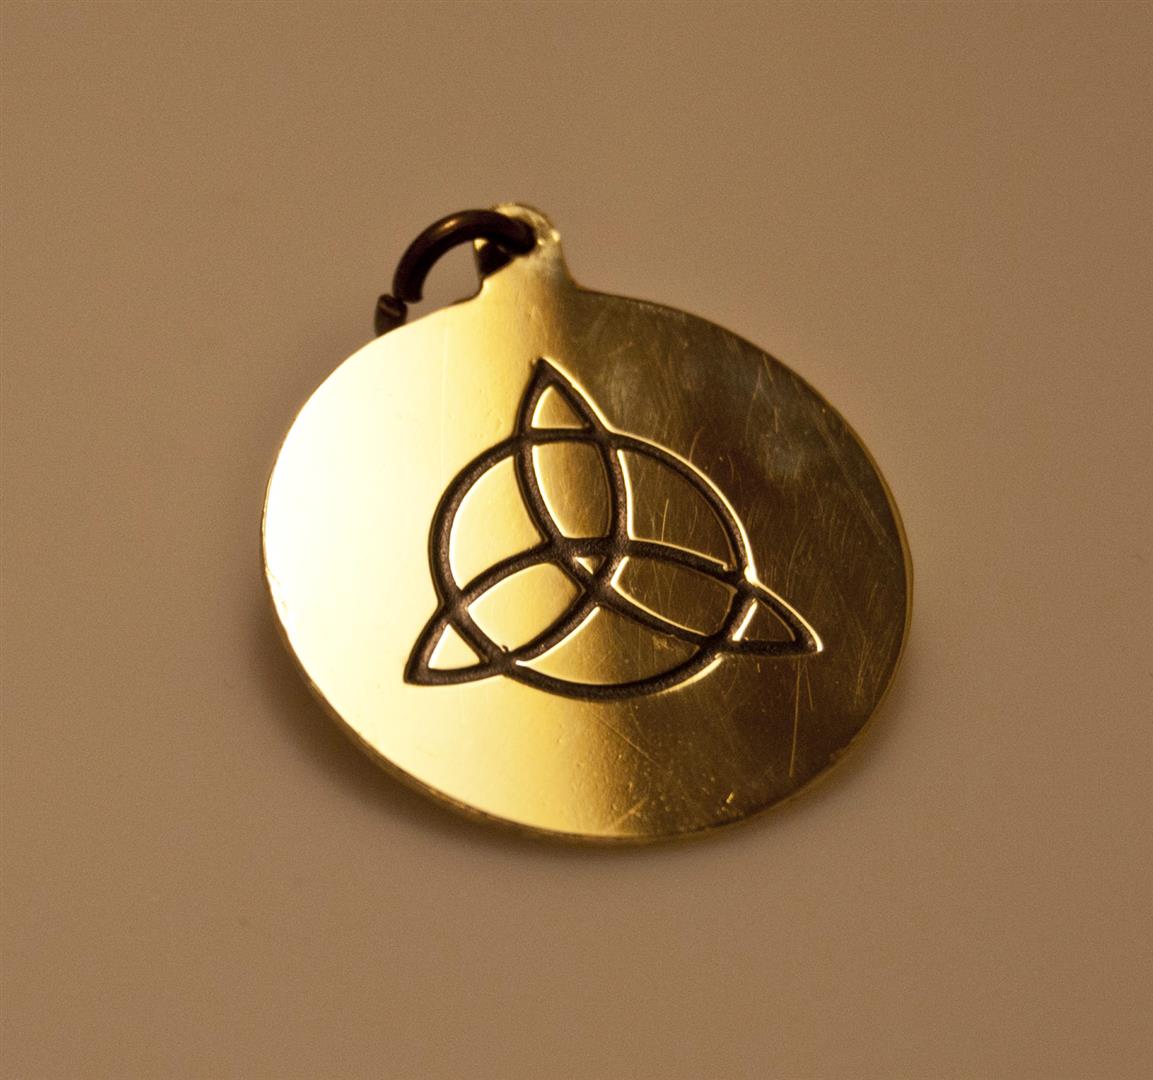
    One day we received a request asking us if we could make the pendant of
    Kit, the Charmed series cat. After a quick search on google we saw it
    was this:

    Kit, el gato de Embrujadas

    Let’s go on. We got some brass and investigate how we could record it.
    It is common for artists to use nitric acid (lowered) but we preferred
    to opt for the ferric chloride, because it emits no fumes and is not a
    hazardous substance. As I’m not the appropriate person to give chemistry
    lessons, this is what Wikipedia tells us about it:

    “In industrial application, iron(III) chloride is used in sewage
    treatment and drinking water production. In this application, FeCl3 in
    slightly basic water reacts with the hydroxide ion to form a floc of
    iron(III) hydroxide, or more precisely formulated as FeO(OH)-, that can
    remove suspended materials.

    It is also used as a leaching agent in chloride hydrometallurgy, for
    example in the production of Si from FeSi. (Silgrain process)
    Another important application of iron(III) chloride is etching copper in
    two-step redox reaction to copper(I) chloride and then to copper(II)
    chloride in the production of printed circuit boards. “

    Ours comes from an electronics store because, as we have seen, it’s used
    to make printed circuit boards.

    Disolución cloruro férricoWith no references to the amount, we did it as many times …at a guess. For the amount of water you see in the picture above we use 2 full tablespoons. This post is pending to update with better information if we make further testings.

    We recommend using warm water to promote the reaction.

    The resulting liquid can be reused, but every time we use it will run worse.

    Plancha de latón limpiaWe prepare the brass only cleaning the surface, because it was an old plate, very dirty, and we need a fairly clean one to stick the mask.
    As you have read in olther posts,we have a vinyl cutter, so once more we
    used it to cut the masks we previously developed (vectorized so that the machine can cut, not just an image).

    Máscaras de viniloThese masks are those that avoid  the corrosion it in the covered area.

    There are several methods to do this, from the most complex using
    photosensitive material, to the simplest one, drawing the part that we do not want to record with a permanent marker.

    Latón con máscaras
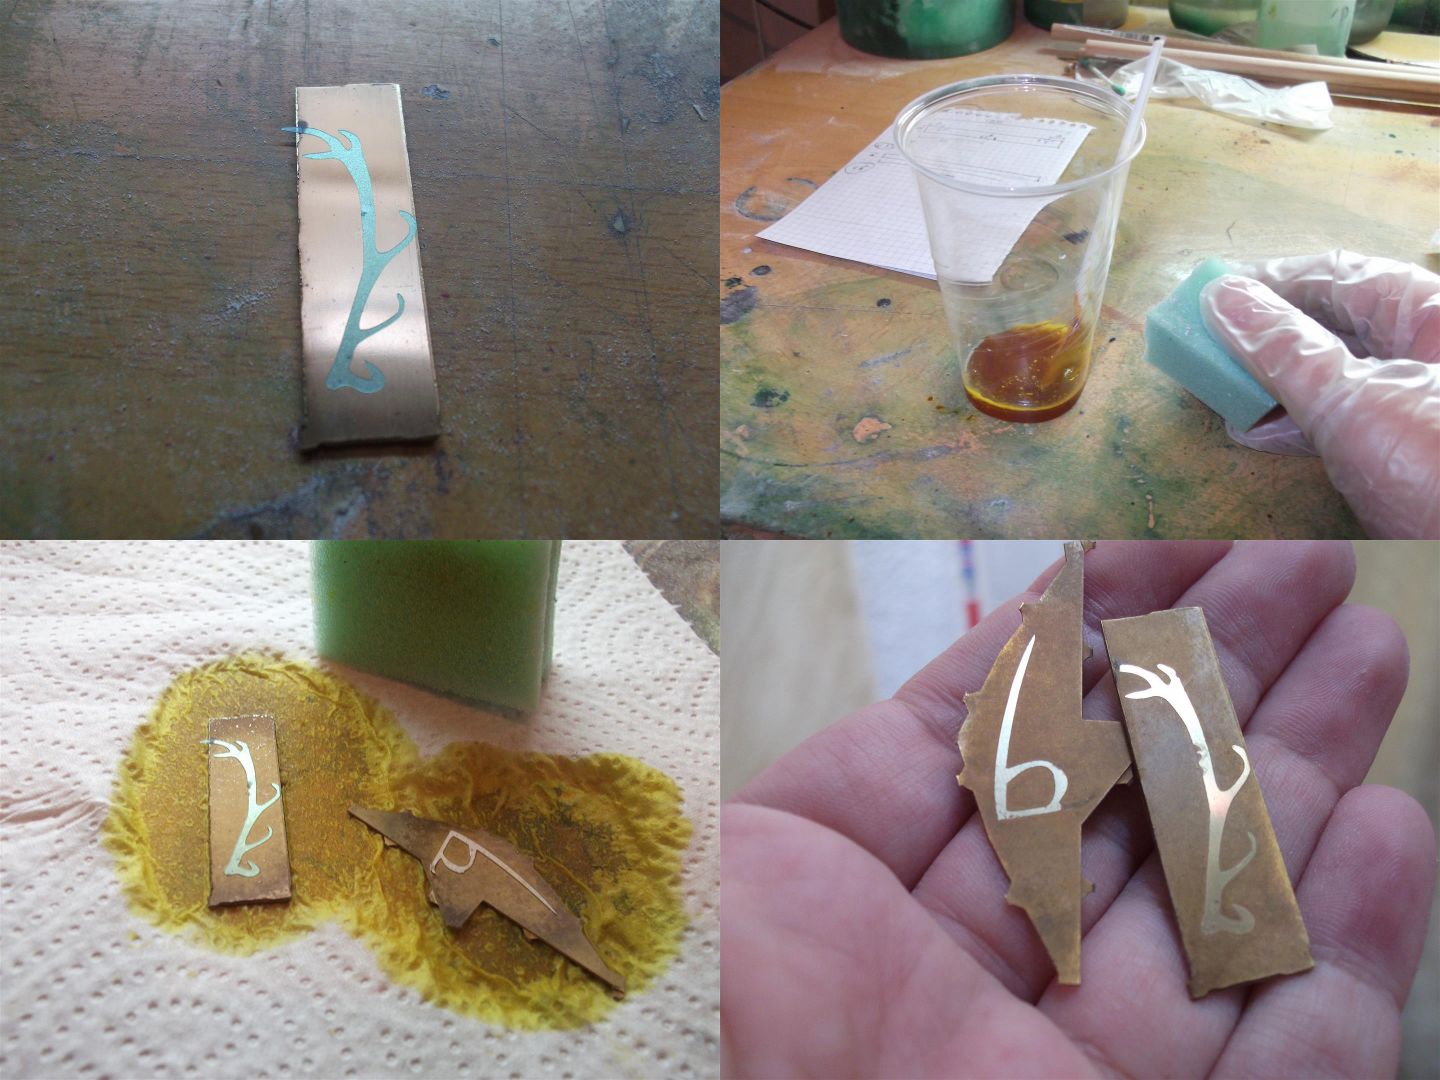
The important thing here is a very good sticking of the mask in brass,without bubbles, which can allow the liquid to enter. Also, the more time is immersed, and deepen the brand, will be easier than vinyl starts to peel. Although the photo does not show it, the plate is also covered on the bottom to avoid corrosion on both sides. It’s up to the piece we’re doing and what you want to achieve.

    We submerge the board in the solution that we have prepared with hot water, and if possible, to help the process we will move the container creating “waves” to clean the excess brass. We did this during the first few minutes but then we left it about an hour to continue working by itself.

    Inmersión de latón.

    This was the result after removing the mask, and after cleaning with metal polish:

    grabado

    After cutting the silhouette with an adequate metal cutting blade in the drill/multitool, and much patience, polish it with the right accessories for that tool (polish paste and felt tip).

    As the drawing is well marked, it’s easy to paint it and remove the excess of paint from the polished surface.

    We recommend to varnish the surface, because the brass gets really bad looking with time.

    Colgante acabado 2

    Colgante acabado

    Another option we have, if we only want to shade the previously polished
    metal, is doing it by hand with a sponge, here’s a summary:

    resumen

    The next thing we will have to prove is make fretwork drawings. Soon we will let you know.

    Meanwhile, if you like this pendant for your cute kitten, you can purchase it here.

  • How to make a face mold  (Alginate and plaster)

    How to make a face mold (Alginate and plaster)

    Many of us have ever done at school or at home a mask using plaster bandages.

    This time we will go a little further. Without actually using professional methods and materials such as latex or silicone, we can make a pretty faithful reproduction of a face (we could have done the whole head, but what interested us at this time was a part of the face and hands).

    To do this we are going to use is “dental alginate” used to make dentures negative. It is a powder that mixed with water becomes a paste in minutes and will allow us to make a single copy,( it bcomes breakable when dryes)

    Looking for information on the alginate, I read everywhere: “you can find in any dental material store”, but it looks that we were the only ones who do not have dental deposits around the corner … (Really, we asked in several places and it was not that simple, at least here in Sevilla). By chance we met a prosthetic that gave us a bit, and eventually over time we found our supplier that also sells online, so here it is:

    http://www.sumbeart.es/53-alginatos

    This provider for spanish buyers.

    For those of you who live out of here I recommend:

    http://www.smooth-on.com/Life-Casting-Alja-/c3_1185/index.html
    The mold making is simple, but I recommend to have the material for pouring (which is going to make the copy) ready, because the alginate will crumble when just dry.

    1. – Prepare the model:

    Alginate is not dangerous, but in the case of face molds must take into account that the model is going to be a while with his face completely covered and will not be able to move. It is possible that for some people this represents a problem. Nor will be able to talk, so you should agree in some sign just in case he feels the need we remove the mask.

    With a clean face, we must collect hair and cover eyebrows and lashes with vaseline to keep from sticking to the mold.

    So he can breathe well we can put a couple of tubes in the nostrils. We didn’t, just took care not to obstruct the air intake, but I insist that it is advisable.

    2. – The alginate:

    There are different types, with more or less working time and some of them change color when they dry (chromatic alginate). If the work surface is large (as in this case) would help some extra hands, because we should cover everything at once. If done in several batches, the alginate will not stick well on himself and wrinkles and imperfections appear.

    Mix the powder with cold water (the colder more time we have to work) in the proportions indicated by the manufacturer.

    Cover the entire surface uniformly while the alginate paste is still fairly fluid. Once it starts hardening we can let accidentally uncovered areas and remain unfilled spaces (in the following photos will see what happens in these areas).

    Let it dry a few minutes until it has completely changed color in the case of chromatic alginate (when you mix is ??pink and turns white when dries) or until you touch and not leave any trace (although still flexible).

    We must be attentive at all times the welfare of our model.

    3 – Bands:

    The mask is not strong enough by itself, so we need something that makes a box or container. This is achieved using plaster bandages (we can buy at any pharmacy)

    To set in the strips we just have to cut them in a manageable size and put them in water to go sticking.


    We try to cover the entire surface, preferably in different directions to make it stronger, and extend the plaster with the hand.

    At this point a warning: Bands take longer to dry and when they do, theycompletely prevent movement, so you have to ensure that the model is in a comfortable position. Miguel, who was the model in this case, threw her head back to help us in the placement of bands and then was uncomfortable.

    4. – Demolding:

    Once the plaster dries, very carefully we began to unmold. Better if the model can cooperate to make sure you do not harm him.

    Once in our hands we can observe every detail printed in the mold. In the picture there is an optical effect by which it seems that we are seeing the positive, but this is the mold (negative)

    5. – Casting the mold:

    Make molds and reproductions is an art, but in this case as we have reproduced only the face, and also the mold is for a single copy, there is no complication. The only thing we have to remember is to plug the nostrils, so that the material does not slip.

    In our case, we filled the mold with plaster (you can buy at any hardware store or warehouse building) and let dry.

    6. – Getting the final piece:

    When the copy is hard we can go “peeling” the layer of plaster and alginate.

    As you can see in the photos, in the eyebrows has appeared excess material, that’s because there we didn’t applied well the alginate, the plaster is very easy to sand so we can fix those flaws with sandpaper.

    For the project we undertook wich I’m not going to tell until we finish (currently parked) we also needed both hands. The process is the same and here is a summary.

    We have to thank our friends Gloria and Juanda who lent us their hands that afternoon, we would not have done it alone, and take pictures at a time.

    If you want to spend an entertaining afternoon try this. You can make hands and feet of your children, if they are older enough to be quiet for a while. You can also use these pieces as a prelude to prosthetic special effects, we have not gotten that far yet but hopefully soon we can investigate and tell you about it here.

  • Here we go!!

    Welcome to Mj2artesanos. We begin a new journey through this world of blogs to give to know some of our work. Try that is dynamic and interesting. We will shortly start our adventure hoping to enjoy and that you enjoy the blog.